Missouri winters don’t play fair with your roof; that is why winter roof care is important. One day it’s 55 degrees and sunny. The next morning, you wake up to ice covering everything. This constant temperature swing creates a unique challenge that Southwest Missouri homeowners face every winter season.
Your roof takes a beating from November through March. Ice dams form along your eaves. Snow piles up and adds weight your roof wasn’t designed to carry for long. And the freeze-thaw cycle works like tiny earthquakes, slowly widening every crack in your roofing materials. Understanding these threats and knowing how to prevent them can save you thousands in repairs.
This guide covers everything Nixa, Springfield, Ozark, and Southwest Missouri homeowners need to know about protecting their roofs through winter. You’ll learn what causes ice dams and how to prevent them, when snow load becomes dangerous, and how our region’s freeze-thaw cycles damage roofs faster than almost anywhere else in the country.
TLDR: Missouri experiences 30-50+ freeze-thaw cycles per winter, making proper attic insulation and ventilation critical for preventing ice dams. Snow loads above 20-25 lbs/sq ft stress most roofs. The three keys to winter roof protection are air sealing your attic, maintaining R-38 insulation, and ensuring proper ventilation from soffit to ridge.
Why Missouri Winters Are Hard on Roofs
Southwest Missouri sits in a unique climate zone where warm Gulf air masses collide with cold Arctic fronts. This creates rapid temperature swings that other regions simply don’t experience. You might see 40-degree temperature changes within 24-48 hours multiple times each winter.
This matters for your roof because of the freeze-thaw cycle. Here’s how it damages roofing materials:
- Daytime temperatures rise above freezing
- Snow and ice melt, sending water into every tiny crack
- Night temperatures drop below 32°F
- Water freezes and expands inside those cracks
- Expansion forces materials apart, widening the damage
- The cycle repeats 30-50+ times each winter
Think of it like micro earthquakes happening inside your shingles, flashing, and decking all winter long. Each cycle widens cracks just a little more. By spring, what started as minor wear becomes major damage.
Materials most affected by freeze-thaw:
| Material | Damage Type | Warning Signs |
|---|---|---|
| Asphalt shingles | Curling, cracking, granule loss | Granules in gutters, visible cracks |
| Metal flashing | Loosened fasteners, gaps | Rust spots, visible separation |
| Roof decking | Weakened structure | Soft spots, sagging areas |
| Gutters | Pulled away from fascia | Visible gaps, water overflow |
Real example: The Peterson family in Springfield noticed their 12-year-old roof looked fine after last summer. But after this winter’s repeated freeze-thaw cycles, they found multiple cracked shingles and flashing that had pulled away from their chimney. The freeze-thaw damage had accelerated wear that might have taken years under normal conditions, leading them to schedule a roof replacement sooner than expected.
Understanding Ice Dams: The Hidden Winter Threat
Ice dams cause more winter roof damage in Missouri than almost any other factor. An ice dam is a ridge of ice that forms along your roof’s edge, blocking melted snow from draining into your gutters.
How Ice Dams Form
Ice dams don’t just happen because it’s cold. They form because of temperature differences on your roof surface:
- Heat escapes from your living space into the attic
- This warm air heats the roof deck from below
- Snow on the upper roof melts even when it’s below freezing outside
- Water runs down toward the eaves
- The roof edge stays cold because there’s no heat below it
- Water refreezes when it hits this cold zone
- Ice builds up, creating a dam
- More meltwater backs up behind the dam
- Water seeps under shingles and into your home
The key insight: ice dams are an attic problem, not a roof problem. A roof with proper insulation and ventilation maintains uniform temperature across its surface, eliminating the conditions ice dams need to form.
Signs of Ice Dam Damage
Watch for these warning signs during and after winter:
- Large icicles hanging from gutters (more than 6 inches)
- Ice buildup along roof edges
- Water stains on ceilings or walls (especially near exterior walls)
- Damp or wet attic insulation
- Peeling paint on soffits or fascia
- Gutters pulling away from the house
Pro tip: Large icicles might look pretty, but they signal heat is escaping through your roof. Don’t ignore them as just a normal winter occurrence.
Preventing Ice Dams: The Three Essential Steps
According to the National Weather Service guide on preventing roof ice dams, preventing ice dams requires addressing three factors: air sealing, insulation, and ventilation. These work together as a system. Fixing one without the others won’t solve the problem.
Step 1: Air Seal Your Attic (Most Important)
Air leaks from your living space into the attic are the primary cause of ice dams. Warm air rises and finds any gap, crack, or penetration it can squeeze through. Common leak locations include:
- Recessed light fixtures
- Attic hatches and pull-down stairs
- Plumbing and electrical penetrations
- Bathroom and kitchen exhaust fans
- HVAC ducts and registers
- Chimney chases
- Top plates where walls meet the attic floor
Sealing these leaks stops warm air from reaching your attic in the first place. Use spray foam for gaps larger than 1/4 inch and caulk for smaller cracks. This single step addresses roughly 90% of ice dam prevention.
| Air Sealing Project | DIY Cost | Professional Cost |
|---|---|---|
| Seal attic hatch | $20-50 | $100-200 |
| Seal recessed lights | $50-100 | $200-400 |
| Complete attic air sealing | $200-500 | $500-2,000 |
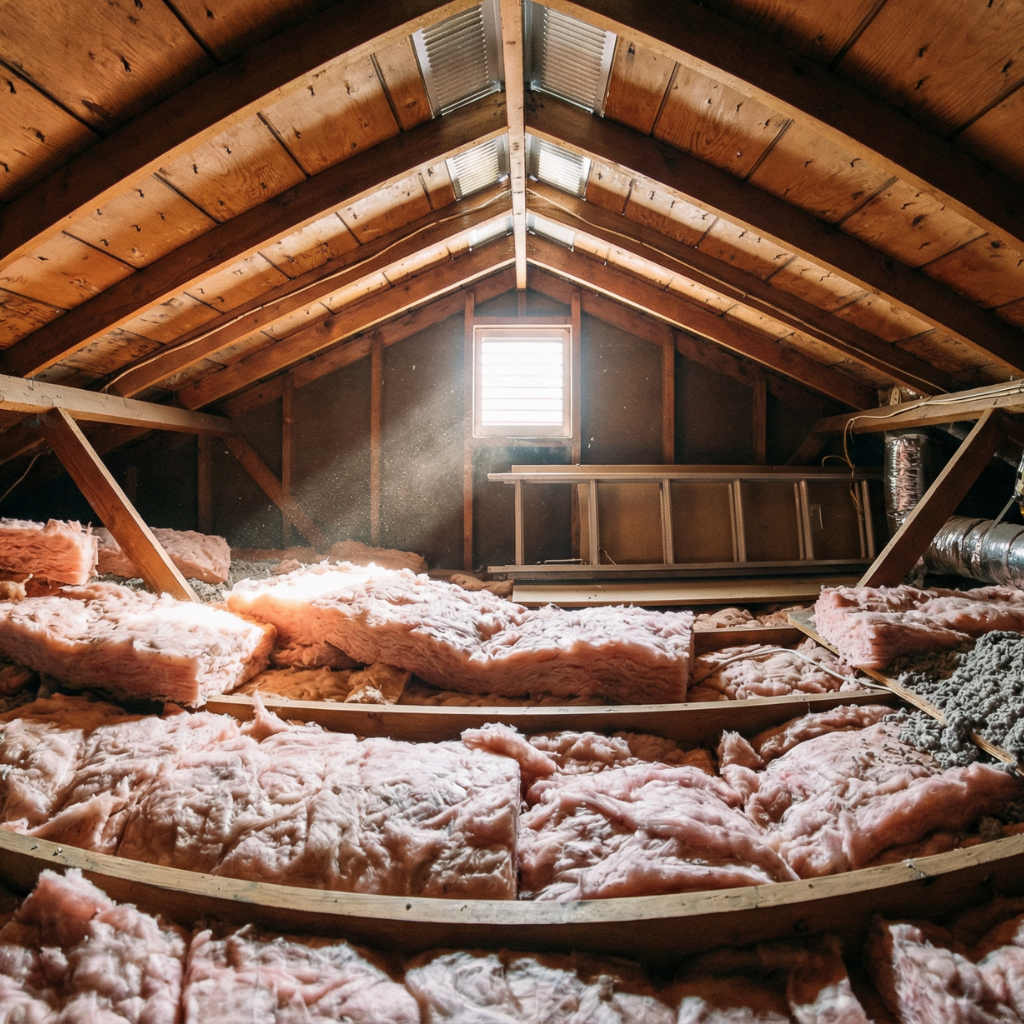
Step 2: Insulate to R-38 Minimum
Insulation slows heat transfer from your living space to the attic. For ice dam prevention, target R-38 minimum in your attic floor. This is the level the Department of Energy recommends for our climate zone.
Check your current insulation depth. For fiberglass batts, R-38 requires about 12 inches of insulation. For blown cellulose, you need approximately 10-11 inches.
Important: Insulation works WITH air sealing, not instead of it. Adding more insulation over leaky gaps just filters warm air as it passes through. You need both.
Step 3: Ventilate Properly
Proper attic ventilation keeps attic temperatures consistent with outside temperatures. This prevents the warm-upper-roof/cold-lower-roof condition that creates ice dams.
Effective ventilation requires:
- Intake vents (at soffits): Let cold outside air enter at the lowest point
- Exhaust vents (at ridge or near peak): Let warm air exit at the highest point
- Clear airflow path: Baffles prevent insulation from blocking soffit vents
- Balanced system: Equal intake and exhaust capacity
The standard ratio is 1 square foot of net free vent area per 300 square feet of attic floor space. Half should be intake (soffits) and half exhaust (ridge).
Real example: The Martinez family in Republic had ice dams every winter despite adding extra insulation. A roof inspection revealed their soffit vents were completely blocked by insulation that had shifted over time. Installing baffles and clearing the vents eliminated their ice dam problem that same winter.
Snow Load: When Weight Becomes Dangerous
Missouri doesn’t get the heavy snowfall of northern states, but we do get occasional significant accumulations. When snow piles up, its weight can stress your roof structure beyond safe limits.
Understanding Snow Weight
Snow weight varies dramatically based on moisture content:
| Snow Type | Weight Per Sq Ft (12 inches) | 2,000 Sq Ft Roof Total |
|---|---|---|
| Light, fluffy | 3-5 lbs | 6,000-10,000 lbs |
| Average | 10-15 lbs | 20,000-30,000 lbs |
| Heavy, wet | 20-30 lbs | 40,000-60,000 lbs |
| Ice | 50+ lbs | 100,000+ lbs |
Most residential roofs are designed to handle 20-40 lbs per square foot of snow load. That sounds like plenty until you realize that 12 inches of heavy, wet snow approaches or exceeds that limit.
Warning Signs of Excessive Snow Load
Take these signs seriously. They indicate your roof structure is under stress:
- Sagging roofline: Visible dips or bowing when viewed from the ground
- Cracking or popping sounds: Structure shifting under load
- Doors and windows sticking: Frame distortion from structural movement
- Cracks in drywall: Especially at corners and around door frames
- Gutters pulling away: Weight pushing down on fascia boards
If you notice multiple warning signs, consider having snow professionally removed from your roof. Never attempt to remove snow yourself by climbing on a snow-covered roof.
Safe Snow Removal
For minor accumulations you can address safely:
- Use a roof rake from ground level
- Remove snow from the lower 3-4 feet of roof (where ice dams form)
- Work gently to avoid damaging shingles
- Never use a shovel, pickaxe, or salt on your roof
- Leave 2-3 inches of snow to protect shingles from rake damage
For heavy accumulations or multi-story homes, hire a professional. The cost of snow removal ($200-500) is far less than structural repairs.
Pre-Winter Roof Preparation Checklist
The best time to prevent winter roof problems is fall, before the first freeze hits. Here’s your complete preparation checklist:
Exterior Inspection
- ✅ Walk around your home and look for damaged, curled, or missing shingles
- ✅ Check flashing around chimneys, vents, and skylights for gaps or rust
- ✅ Inspect gutters for damage, sagging, or loose sections
- ✅ Look for signs of previous water damage or staining on fascia
- ✅ Note any areas where previous repairs might be failing
Gutter Maintenance
- ✅ Clean all leaves, twigs, and debris from gutters
- ✅ Flush downspouts with a garden hose to check for clogs
- ✅ Verify downspouts direct water at least 4 feet from foundation
- ✅ Repair any loose or damaged gutter sections
- ✅ Consider gutter guards if debris is a recurring problem
Attic Preparation
- ✅ Check that soffit vents are clear and unobstructed
- ✅ Verify ridge or roof vents are functioning
- ✅ Look for obvious air leaks (light coming through gaps)
- ✅ Assess insulation depth and condition
- ✅ Check for signs of moisture, mold, or pest intrusion
Tree Trimming
- ✅ Prune any branches hanging over your roof
- ✅ Remove dead or damaged limbs that could fall during ice storms
- ✅ Clear debris that’s accumulated on the roof surface
Pro tip: Schedule a professional roof inspection before winter if your roof is over 10 years old or you’ve noticed any warning signs. Many issues are much easier (and cheaper) to fix in fall than after winter damage compounds them.
During-Winter Monitoring
Winter roof care doesn’t stop after preparation. Stay vigilant throughout the season.
After Every Major Storm
Walk around your home and check for new damage, missing shingles, or debris. Monitor icicle formation and ice dam buildup along eaves. Check your attic for new moisture or leaks.
Monthly Throughout Winter
Clear gutters if debris has accumulated. Check attic temperature (it should be close to outdoor temperature). Monitor ceilings and walls for new water stains.
Emergency Ice Dam Removal
If ice dams form and you see water staining inside, act quickly but carefully. Create drainage channels using calcium chloride in pantyhose laid perpendicular to the ice dam. Never use rock salt (it damages roofing materials) or chip at ice (you’ll damage shingles). Call a professional if the problem is severe.
| Emergency Solution | Cost | Effectiveness |
|---|---|---|
| Calcium chloride socks | $20-50 | Good for minor dams |
| Heat cables | $200-500 installed | Moderate (temporary) |
| Professional steam removal | $300-800 | Excellent |
Post-Winter Inspection: What to Look For
Spring is critical inspection time. Winter damage may not be obvious until warmer weather arrives.
Exterior Assessment
Look for new cracks, lifted edges, or missing shingles. Check all flashing for gaps, rust, or separation. Examine areas where ice dams formed. Inspect gutters for winter damage and look for fascia board softening or warping.
Interior Inspection
Check ceilings for water stains, especially near exterior walls. Look for peeling paint on ceilings and upper walls. Inspect attic for moisture, mold, or wet insulation. Note musty odors that indicate hidden moisture.
When to Call a Professional
Schedule a professional roof inspection if you notice multiple damaged shingles, evidence of water intrusion, significant ice dam activity during winter, sagging roofline, or if your roof is 15+ years old.
Real example: The Thompson family in Ozark thought their roof survived winter fine. A spring inspection revealed freeze-thaw damage had cracked flashing around three pipe boots. Water had been slowly entering their attic for weeks, causing mold growth. Early detection saved them from a much larger remediation project.
Frequently Asked Questions
How many freeze-thaw cycles does Missouri get each winter? Southwest Missouri typically experiences 30-50+ freeze-thaw cycles per winter, among the highest rates in the United States.
Can ice dams form even with good insulation? Yes, if your attic has air leaks. Warm air bypassing insulation heats the roof deck directly. Air sealing is actually more important than insulation for ice dam prevention.
How much snow is too much for my roof? Most residential roofs handle 20-40 lbs per square foot. Heavy wet snow at 12 inches can exceed 30 lbs/sq ft. When snow exceeds 2 feet of heavy accumulation, consider professional removal.
Can I prevent ice dams with heat cables alone? Heat cables are a band-aid, not a solution. They consume energy and don’t address the root cause. Proper air sealing, insulation, and ventilation provide permanent prevention.
When should I schedule a roof inspection for winter damage? Early spring (March-April) is ideal. This gives time to complete any necessary repairs before summer storms arrive.
Key Takeaways
- Freeze-thaw cycles cause cumulative damage. Missouri’s 30-50+ cycles per winter accelerate roof aging significantly.
- Ice dams result from uneven roof temperatures caused by attic air leaks, inadequate insulation, and poor ventilation.
- Prevention requires all three: Air sealing (most important), R-38 insulation, and balanced soffit-to-ridge ventilation.
- Snow load becomes dangerous above 20-25 lbs per square foot. Watch for warning signs like sagging rooflines and structural sounds.
- Pre-winter preparation in fall prevents most winter roof problems. Clean gutters, check ventilation, and address any existing damage.
- Spring inspection catches winter damage before it becomes worse. Look for water stains, damaged shingles, and compromised flashing.
Protect Your Roof This Winter
Missouri winters test your roof every year. The freeze-thaw cycles, ice dam potential, and occasional heavy snow all take their toll. But with proper preparation and monitoring, your roof can handle whatever winter throws at it.
If you’re concerned about your roof’s ability to handle another Missouri winter, or if you noticed ice dams, leaks, or damage last year, now is the time to act. A professional inspection can identify vulnerabilities before they become expensive problems.
Roov offers free winter roof assessments throughout Southwest Missouri:
- Complete exterior and interior roof evaluation
- Attic ventilation and insulation assessment
- Ice dam risk analysis
- Detailed recommendations with no pressure
Call: 417-370-1259 Email: [email protected] Visit: roovmo.com
We serve Nixa, Ozark, Springfield, Branson, Republic, Bolivar, and all surrounding communities. Schedule your free inspection today and go into winter with confidence.
Roov | Roofing with a Purpose | Serving Southwest Missouri